Friday, June 29, 2012

Chile Rellenos

It's Friday again, and that means it's time for a recipe!!! Yum! This week I'm going to share with you a recipe that J and I tried for the first time, Chile Rellenos.  This is one of J's favorite thing to get when we go to this fantastic Mexican restaurant here in Madison.  And I will say, I enjoy this dish as well. 

This wasn't that over cooked, even though it looks charred.

We decided that is was time to try to make it ourselves.  We were worried that it would be difficult, but it really wasn't. 

Ingredients
  • 4-6 pablano peppers
  • 1/2 lb queso blanco -  I forgot to pick this up, so I used mozzarella, I know not really traditional, but still yummy
  • 1/4 c flour
  • 2 eggs
  • frying oil

Directions

1.)  Preheat your broiler to 550 degrees.  You can also char the peppers on stove top, but I like the broiler method the best.  
2.)  Wash the peppers and then place them on a lightly sprayed cookie sheet.  Place the peppers in your oven about 4-6 inches from the broiler.  I used the second from the top rack.
3.)  Cook the peppers until the skin blisters and starts to turn black.  Turn the peppers so all the sides are cooked.  This takes about 10-15 minutes.
4.)  Once the peppers are blackened, take them out of the oven and place them in a bowl.  Cover the bowl with plastic wrap and allow the peppers to sit in the bowl for 30 minutes.
5.)  While the peppers are steaming, separate the eggs.  Set the yolks aside.  Beat the whites until stiff.  Then gently fold the yolks into the now stiff egg whites.   
6.)  After the peppers have steamed, take them out and peal the the skin off.  The skin will come off easily.  Make sure to get all of the skin off.
7.)  Make a slice in the side of the peppers and remove the seeds inside.
8.)  Stuff the peppers with the cheese
9.)  Roll the peppers in the flour
10.)  Then place the peppers in the egg mixture and cover the peppers.
11.)  Carefully place the peppers in a pan of hot oil.  Cook the peppers until they are brown on both sides.  This does not take very long.
12.)  Then drain the peppers on some paper towels.


You can eat these peppers just like this or you can make a traditional tomato based sauce.  We decided to eat them plain with a side of Spanish rice and some homemade salsa.


These were so good and pretty easy to make.  We will definitely be making these again.  Try this recipe out and let me know what you thought.

Have a great weekend and stay cool.   

Recipe adapted from Food.com   

Wednesday, June 27, 2012

Party Planning

How do you feel about party planning?  Do you love to plan the party or does the thought of planning a party make you want to run and hide?  Well I'm one that loves, okay, LOVES, to plan parties.  I love planning and having them, even if I get a little stressed out and crazy, but that's normally just my OCD talking.


We J and I have decided we're having our house warming party this year.  You would think that after owning a house for 18 months, this would have already happened, but it hasn't.  We've just been too busy to have an official party.  So we've decided to set a date, which will give us motivation to get projects done.  Especially those projects that aren't all that fun (going through the boxes and boxes that need to be donated or pulling out the rock "garden").

So as soon as we decided to set a date, I felt that was my go ahead for planning.  Right, yeah, I'm sure that's what J meant.  Actually he's being a pretty good sport.  He hasn't even once told me to drop the subject and he even seems interested in some of my ideas.  And he is the one that suggested I start making lists of cocktails, taking inspiration from some of our favorite bar and restaurants.  He may not be as excited as me, but he is playing along nicely.

I'm using Evernote to keep all my ideas in one place.  I love it, I have it one my computer, my phone, and my work computer (I use it for other things as well).  I can take a note or picture anywhere I get an idea or see some inspiration.  It's wonderful.  This is not a paid endorsement, I just love it.

I also use good ol' Pinterest.  If you can't find decorating ideas or recipes on there, well then you won't find anything anywhere.  I have a board dedicated just to house warming things.    

So what are some of the things I'm thinking about?

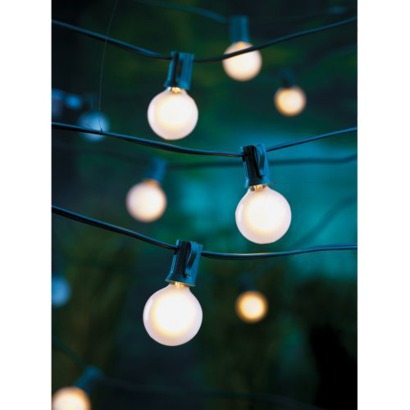
I know I want some fantastic outdoor lighting, because as long as the weather is nice, we plan on having almost everything outside or on the porch.

Restoration Hardware
So what about these awesome globe lights from Resturation Hardware?  Nice, right?  But the price range is a little out of budget, so I found the same thing at target for $13.  How awesome.  I can see a few strands hanging from the house to the large red oak out back.  Or maybe between the house and the garage.


Target
I also was thinking of having some lanterns, either hanging or just sitting on the deck.  I love these, but again, they are a little out of budget, so I might try to hit up the thrift stores and see what I can find there.

Restoration Hardware
I did find my great copper lantern last year at a thrift store, so maybe I'll luck out again this year.

Or we can make some of these.

Erik's Recycled Wine Bottle Torch
Oh my, do I love these wine bottle torches.  They look so much nicer then the bamboo tiki torches.  I had nice copper torches at one time, but we had a tornado move through, and they were gone.  Don't worry the tornado missed us, but there was still a lot of wind.  Also that was almost 8 years ago.  But this website has the instructions on how to make some yourself.  I don't care, we will be making some of these.

I also can't wait to try this idea I saw in Better Homes and Gardens, individual cocktails in mason jars.  OH MY!

This is why we're making lists of cocktails that would be great for a summer get together.  I have a list of ideas, which contains a bunch of sangria recipes.  Do you have any suggestions for summer cocktails?  Any favorites?

I also have a list of finger food that I would like to make.  I want people to be able to eat the food while standing and mingling.  I'm trying to avoid any food the needs utensils or both hands.  But I still want people to have a meal.  So the food list is a work in progress.  Any suggestions on food?  I'd love to hear what works best or what you love seeing at a party.

So that's what I have so far.  It's not a lot, but I still have two and half months to plan.  I feel if I start planning some of it now, it will seem less stressful when August finally rolls around.  What do you think?  Am I crazy for staring this early?

Monday, June 25, 2012

The start of a new project!

It's Monday again, ho hum.  We had a pretty great, but busy weekend here in Madtown.  Saturday morning I had an art/craft show, so we got to spend the majority of the day outside talking with people and spending some time together.  Then J had a show that night, so we spent the majority of the night hanging out with friends and listening to awesome punk music.  We were up at 5:30 am and didn't get to bed until 2:00 am.  That's a long day. 

We did a few things around the house (put the last of the trim up around the tile) on Sunday and then did a little shopping.  We stopped at a little Tibetan place for dinner, which was amazing.  We both had sizzling plates.  Yum, yum.

And now J's off to some training for a few days, so I'm holding down the fort.  This is my last week of work before my July vacation (my much needed vacation).  Which I will be starting the bathroom remodel.  I know, sounds like a fun vacation.  It will be.

And speaking of the bathroom redo, we've been trying to get a little heads start on that.  We headed over to Menards this past weekend to look at, and possibly order, a new double vanity.  We picked out a few that were pocketbook friendly, but we also saw one that we really loved.

It's called Piedrafina marble.  Have you guys ever heard of this?  It's a crushed marble that is set in resin.  The marble is all stone that was thrown away, so it's eco friendly.  Which makes us happy.  The Piedrafina is made up of 95% natural stone, so you're not paying for a large piece of resin.  We think it looks pretty cool.

Plumbersurplus.com

I know it's hard to see the "crushed" marble in this picture, but this is what the vanity would look like.  It's a nice 61" vanity top that would fit our modern grey and white color pallet well.    

pfsurfaces.com

Here is a close up of what the material looks like.  This color is the bianco, which is probably the color we would pick. 

I really love it and it makes me happy to know it's recycled.  Okay, that really makes me happy.  What, I love my mother nature, I can't help it.  It's a little on the pricy side, but it's still cheaper then the solid surfaces we looked at. 

This vanity is about $750 shipped to our door.  Which isn't bad.  The budget friendly vanities were around $300, so this one is a little over double in price.  So we'll have to decide if we want to splurge on a vanity, or just go with a plain white vanity and save some money.

What do you guys think?  Have you seen Piedrarfina before or do you have it in your house?  Do you like the look or do you think it will looked aged in a few years?  I'd love to hear your opinions. 

Friday, June 22, 2012

This Week's Yummy!


This week's recipe is an easy one, but one of my favorites.  Caprese salad.  Oh, just thinking about this is making my mouth water.  I will make this as an after work snack or for a party.  It's simple and we always have the ingredients on hand.

So lets get started.

Ingredients
  • roma tomatoes
  • fresh basil - this needs to be fresh, no dried stuff here
  • mozzarella cheese - whole mild mozzarella works the best, but normal mozzarella will work
  • olive oil
  • balsamic vinegar - an aged balsamic is best.  The older it is the sweeter it will be.

Directions

1. Cut up tomatoes.  I normally dice them, but you could also slice them.  I use roma tomatoes because they have a lot of "meat" and very little seeds.  But you could use anything you have on hand.
2. Cut Basil into small pieces.  Again, I cut mine up into little squares, but many caprase salads will have the whole leaves.  It's up to you what you want to do.
3. Cut cheese into slices.
4. Place your tomatoes, basil, and cheese on a plate.  Arrange how ever you want, but remember the correct way to eat this is a bit that contains a little bit of everything.
5. Drizzle with olive oil and balsamic vinegar. 
6. Eat and enjoy!!!


Now that was easy.  I get me olive oil and balsamic vinegar from a local oil shop, but most grocery stores will carry these things.  I suggest spending the money on good quality oil and vinegar, it's worth it.  I use a 25 year balsamic, oh yes, you buy it like wine.  I also use a truffle infused olive oil, but regular extra virgin is just as good.  And again, the high quality oil, the better.

And if you don't want to doll out the money for aged balsamic, you can "make" your own.  Just take cheap balsamic and simmer it on the stove on the lowest setting (you DON'T want it to bubble or boil) until it is reduced to about third the volume.  Make sure you check it and stir it every once in a while.  It will be really thick and sweet.  I takes a few hours to do this, but it's cheaper then naturally aged vinegar. 

I also try to keep a basil plant going at all times.  As long as you keep them from blooming, they will continue to produce yummy leaves.  I currently have sweet basil, purple basil, and Thia basil.  They all smell so good.  And basil is easy to grow indoors.

This is a great salad for summer.  I hope you enjoy this simple recipe.   I know we do.

Wednesday, June 20, 2012

Donating!

Everyone knows that I love to thrift.  I love going and finding something special, something that just needs a little care to be amazing.  But I'm also a big believer in donating to the places I thrift from.  That's how they make a difference for people in need.  They need people to continue to give them things to sell.  So a couple weekends ago was not a thrifting weekend, it was a donating weekend!

We started to clean out the garage, so some of the bigger things needed to go.  Our pantry, bathroom shelves, and some glass light shades went to the ReStore.  It was so nice to get that out of the garage, now you don't have to squeeze around anything to get to the back of the garage.  And hopefully, they will go to good homes with people that will get some use out of them.

This went to ReStore 
And we also started tackling the sun room.  I've put together a list of goals for this month, and one of them is to get this room cleaned.  We use the sun room as a catch all for a lot of our projects.  I also paint and stain out there in the winter months.  So, it's a mess.  I mean, just look at it.


Yup, that's what it looked like before I started.  Oh my, lets see what's all out there.  All the food from the kitchen is out there until we get the cabinets and trim done.  Not exactly where I want my food, but it will have to do until we're done.  Our bikes our out there.  Yes, we have four bikes for two people.  Doesn't every one?  Most of the trim we have taken out of the house as well as the stuff that needs to go back in, is in the sun room.  Our outsides lights.  And boxes of clothes and housewares that need to go to Goodwill.  Plus a lot of random things.


But this is what it looked like at the end of the weekend.  That was a couple of trips to the thrift store later.  Looks a lot better, doesn't it?  I know we have a lot of work left to do, but it's getting better.  We have some furniture that will be going up on Craigslist soon.  Anyone want and ugly chair?  Or maybe a large bookcase?  We have both.  We also have a basket ball hoop.  If you want it, it's yours.  

I got up early to try and get the boxes sorted through before the temperature got up in the 80/90s.  And in my rush to get all the boxes sorted, this happened.


The bottom of box containing the dishes broke, and then in turn all but a few dishes broke.  I was so sad.  This would have been almost a complete set of dishes, and I was only able to save a handful of them.  But I guess a few is better then none.  Hopefully someone will want whats was left.

Then with a little bit more cleaning, we have this.


Still not perfect, but it looks a lot better then it did.  The doors for the kitchen cabinet are waiting to be stained.  And as soon as the 90+ degree weather passes, I'll get those done.  My canopy for my art show this weekend is sitting in there, but will be back in it's place come Monday.   And a few other things need to find a home, but overall, pretty nice looking.

I can't wait to start painting this room.  We're going to go light with the walls to brighten up the room.  I'm also going to do a floor to ceiling sheer curtain on the patio door, to block the view into my studio.  Then add a little furniture and we'll have a nice little place to relax.

And I'm serious about the chair, bookcase, and basketball hoop.  If want one or all, let me know.  If you can haul it, you can have it!!

Monday, June 18, 2012

A little backyard clean up

Wow, it's been a week since I posted last.  Bad blogger.  Well if I had to use an excuse, I have been super busy at work.  I've been going in early and leaving late just to get a few projects done.  But that's how it goes.

We have been doing things around the house, I promise.  Last Friday I took a day off of work and decided the backyard needed a little bit of a sprucing up.  We don't plan on doing any major work on the backyard until next year, but a little bit of a clean up was in need.


We have this wonderful planter in our backyard. Okay I didn't actually mean it was wonderful.  It's not wonderful.  It takes up a huge portion of the backyard and it sits between the door and the deck.  So to use the deck you have to walk all the way around the sun room and this planter.

And it's full of rocks.  No plants, no pretty things, no decorative rocks.  Just plain landscaping rocks and some asphalt chunks, and some cement chunks, and some broken Terra cotta.  I think it started out being something nice, but then the previous owners just chucked any sort of "rock" in it as time went on.

So I hated it.  I hated it with a passion.  It was full of leaves and sticks, two of the things Yoda loves to eat (hey she's a pug, she'll eat anything.  And no, we don't actually let her eat these things, they aren't good for her).  I wanted it gone.

We plan on building a deck that wraps all the way around the sun room and then having a little stone patio with a fire pit.  It sounds great.  I can't wait for this to happen.  But it won't even be started until next year.  That meant another year of staring at this awful thing.  So I decided to do something about it.

Last Friday I planned on adding flowers to this "thing".  But as I started, I reliezed it was hard to plant flowers in all those rocks and there was a barrier down to prevent things from growing.  So change of plans.  I moved all of the rocks out of there and behind the shed  


Oh yeah, all by myself, I moved all the rocks.  It took me a few hours to do, but I did it.  J didn't think I'd be able to do it, but I did.  I was so proud of myself.  I just loaded up my little gardening cart and slowly moved everything to the back of the yard.  I felt good.


Then I planted all my flowers and added some mulch that matched the stuff in the front of the house.  I also picked up a third window box (they are70% off at Joann's right now).  It looks so much better.  I still want it ripped out and a deck built in it's place, but it will make me happy this summer.


I didn't realize how washed out these pictures were until I uploaded them, so I'll try and get a couple nice ones tonight.  You'll have to take my word for it, it looks pretty nice.

I also replanted my mint plant and trimmed the hedges.  We also trimmed the maple tree in the back yard.  Now our yard looks fairly nice.  I just need a couple patio chairs and we can enjoy it.  

And for most of the weekend, I had my little friend keeping me company.


This is our yard bunny.  You can't really tell from the picture, but he's still a baby.  A very little baby.  We're not sure why he's so small, most of the baby bunnies are all grown up by now.  But he lives in the back yard and is pretty friendly.  I let him stay because I have fences around all of my plants, but the second he starts eating my plants, we will no longer be friends.

What did you accomplish this past weekend?  Anything exciting?

Monday, June 11, 2012

June Goals

Since J is in school most of the year, we have to make sure we have our goals for the summer set.  We need to make use of every day we have.  Last year, our goal was to get the most time consuming things done in the kitchen and most of the rooms painted.  This year it is to finish up the kitchen, get the upstairs bathroom remodeled, and paint the sun room.  All things we can get done if we stick to a little bit of a

So our goals for this month are:

1.) Finish up the trim, tile, and electrical work in the kitchen
        ~ I'm hoping we can get this done this coming weekend
2.) Pick out paint colors for the upstairs bathroom
        ~ we don't have to buy it, just settle on the colors we want in there
3.) Finish cleaning up the sun room
        ~ I want to have this room clean enough to paint by next month
4.) Plant flowers in the "rock garden" our back
        ~ I decided that I'm sick of looking at this and I'm planting flowers in it this year, next year we're removing it.
5.) Order our vanity for the bathroom
        ~We need to get a double vanity ordered


I think that we can do these 5 things with what is left of this month.  And who knows, maybe we'll get started with demo in the upstairs bathroom by the end of the month.  We'll see.

What are some of your goals for this month?

Thursday, June 7, 2012

May 2012 Recap

Oh wow, it's June 7th already.  Where is the time going?  It seems like the last 18 months has flown by.  I mean it's still sinking in that we own a house and we have for the past 18 months.  We are still telling people that we just bought a house.  I guess we've actually owned it for a while.  Weird.

Lets take a look back at some of our accomplishes in May.

J finished up his first year of grad school.  

Photo from the UW Madison website
He now has only two and a half years to go.  It sounds like a lot, but it really isn't.  In a few short years, he'll have is masters degree.  I'm so proud of him; working full time, taking classes, putting up with me and the house.     

We planted the garden.

This is not my garden, but I hope it looks like this soon.

We filled the second of our three raised beds with a soil combo that I read was better for the plants.  Then we filled our two finished beds with a bunch of veggies.  All of which I hope do well.  This is only our second year with a "real" garden.  And the first time that we're trying things like broccoli and garlic.  But I'm hoping for a full bounty and I'm hoping to try out canning this fall.  I'll keep you posted on that.

We planted flowers out front


Okay, "we" didn't do this, I did this.  I used some of my birthday money to fill the pots out front with lovely flowers.  We're trying not to plant anything permanent because we might paint the house this year.  This way, we don't have to paint around plants, we just have to move the pots.  But we first will see how the bathroom renovation goes before we will decide if painting is in our near future.

We got to see Neil deGrasse Tyson

Neil deGrasse Tyson at the Memorial Union
One of the best things about working on campus is some of the speakers you get to see.  Neil deGrasse Tyson was one of the best.  And I even convinced J to leave work early to come see him.  It was a beautiful day on Lake Mendota and it was a wonderful talk.  We didn't get to meet him or get his autograph because there were so many other people there to see him.  This guys is like a rock star.  Hopefully he'll be back.

We tiled our kitchen backsplash 

New tile
This one was a long one coming.  We've had the tile for months now.  I think we might have bought it back around Christmas, maybe Thanksgiving.  It was a little bit of work, but it was worth it.  I'm in love with how it looks and it really completes the kitchen.  This was possibly one of my favorite projects.

We didn't accomplish that much in May, but that's because J was still in school for half of it.  But now that he's done for the summer, we'll be cranking out a bunch of projects.  The next major project is the bathroom.  But I'm hoping that won't be as involved as the kitchen. We'll see, everyone that's done home improvement knows projects are never as easy as you plan.  But that's the fun part, right?!?  

Monday, June 4, 2012

Backsplash - Take Two


How was everyone's weekend?  I hope it was full of joy and creativity.  On Sunday we went to J's cousin's graduation party and then stopped by J's parent's for a while afterwards.  It was a nice little party.

On Saturday however, we took step two in the new backsplash.  We grouted!!!  Oh yes, we spent our Saturday working on the backsplash, rebels we are!  But it looks amazing, so totally worth giving up part of a Saturday afternoon.

I won't go over all the steps in grouting a tile, because you can find how to's on the internets that were written by professionals.  We, we are far from professionals.  But I will go over some of the things we learned and some of the things we did.

Here are the tools we needed.  1) tile float, 2) grout (either premixed or powder), 3) putty knives, 4) rags, 5) two buckets of water, 6) sponge(s) 7) caulk

We went with Biscuit colored grout.  It's lighter then the tile and complements the rest of the colors in the kitchen.  Because we have glass tile, we had to go with the unsanded grout.  The sand could scratch the glass, so it's a really good idea to skip it.  The company that made the grout also makes color matched caulk, which is fantastic.  


And here is the first grout going up.  J applied the grout while I followed behind trying to clean up some of the corners and edges.  The grout should sit for 15-30 min before you start cleaning, so I set a timer for 30 min when J started.

Now because we have a slate and glass mosaic tile, clean up was a little trickier then ceramic tile.  A lot of people suggest using a grout bag and individually grouting each line, but that would have taken us hour and hours to do.  So we applied the grout as you would normally do and then took a few extra steps in cleaning.


I first took a small sponge and scrubbed all the slate tiles as well as I could.  I got as much of the grout off as I possibly could.  I then used a larger sponge to wipe the majority of the grout off the wall.  Then came the third sponge which was used to get what was left of the haze.

This took a very long time.  A lot longer then it normally takes to clean up tile.  And after I had finished half of it my hands were sad, little, painful, prunes.  J had finished applying the grout by this time, so he took over the cleaning part for me.  He's such a good guy.

After you sponge the wall a haze will appear which you need to buff out.  My method consisted of me using a damp cloth to clean out any of the tiny crevices I missed with the sponge.  I then wiped a small areas with the damp cloth, rinsed it out, wiped the area again, and then dried/buffed with a microfiber cloth.  It worked like a charm.

J finishing doing some cleaning
Now the tile has to sit for 72 hrs to one week before I can seal the slate.  The grout was , so it does not need to be sealed, which is nice.  We also are waiting a few days before we put the trim up, just to make sure everything is set up and dry.

We also plan on replacing all the different colored outlets with dark brown or black outlets to blend in with the tile.  But that will have to wait until a little bit.


So this is what the kitchen looks at this moment.  I'm in love.  The tile needs the trim and the cabinet needs to be cut down and stained.  As soon as we get those few things done, the kitchen is done for now.  We can move one to other projects, like the sunroom and the bathroom.   

After we were done with all of this tile, we did tackle one other tile related task.  We got down on our hands and knees and scrubbed the haze that was still on our flour tiles.  We installed the grouted vinyl, so we could not use any sort of de-hazer.  The only option left to us was a scrub pad, vinegar with a little bit of blue dish soap, and some elbow grease.  I know, the flour has been in for almost a year and we're finally getting around to cleaning up the haze.  It's just such a tedious, awful job, we didn't want to do it.  But it's done now, and we can cross that off our list.

Take care and never stop being creative. 

Friday, June 1, 2012

Tortillas!


I get a lot of people asking me what I cook since J is a vegetarian.  I try to explain to people that there are a lot of different things I can make.  Almost anything that can be made with meat, can be made without.  It's not all salads in our house.  Actually, I eat way more salad then J ever does.  So I thought I would start sharing some of my recipes with everyone.  If that's okay? :-)

One of our favorite things to enjoy is tacos.  We love tacos in our house.  It's one of those things that I don't think we could get tired off.  I mean, who would hate tacos?  No one, that's who.

And our tacos are even more delicious because we make everything from scratch.  Salsa, guacamole, tortillas, even the taco seasoning.  Yum tacos!

Mine are never a perfect circle, but someday!
So if you were just thinking about making tacos for dinner tonight, here is the tortilla recipe I use to make our taco night awesome.  Seriously, once you make tortillas, you'll never go back to store bought ones.  They are that delicious. 

Flour Tortillas

Ingredients
  • 2 c flour, give or take 
  • 1/2 tsp baking powder
  • pinch of salt
  • 3/4 c boiling water
  • 3 tbs olive oil
 Directions
  1.  In a lg bowl, combine flour, baking powder, and salt.  
  2. Add the boiling water and olive oil to the dry ingredients.  I use a wooden spoon to mix because the water is too hot at first.  (don't ask me how I know).
  3. What it should look like with all the ingredients mixed
  4. Add more flour or water to get a smooth texture.
  5. Once the liquids and dry ingredients are well combined, turn onto a floured surface.  I use corn meal.  
  6. Knead the dough for about 10-12 times. 
  7. Divide the dough into 6-8 portions.  We make huge tortillas, so it just depends on the size you would like.
  8. Let the dough sit for at least 30 minutes
  9. Roll the dough to your desired thickness.
  10. Preheat a large non stick skillet over med heat (I use my cast iron skillet).  
  11. Cook tortilla on each side for about 1 min each side or until side is lightly browned.  
  12. Enjoy
 Recipe adapted from Taste of Home tortilla recipe


These are great with tacos or just with a little butter.  I love to eat them warm.  They keep in the fridge for a week or so.  And to heat them back up I just put them on a warm skillet just long enough to warm them up.  I'm sure you can warm them up in the microwave as well.

In my mind these are healthier for you because they don't use lard.  Now if they are healthier, I'm not sure.  I plan on trying them with whole grain flour, so I'll let you know how those turn out.