Monday, September 30, 2013

Deck Building - Day Six!

We have installed all of the decking, YAY!  It finally is a usable deck, not a finished deck, but a usable one.  Which I'm okay with that.  So what did we accomplish this weekend?

Well we cut all the overhang off, which made it actually look like a deck.  First we marked where we needed to cut with a chalk line.


Then we got to cutting.


I snapped this photo quick and then held the boards while he cut them.  But I didn't want to risk my fingers, so if the boards were shorter, I just let them drop to the ground.  I didn't want to loose any fingers.  We did the cuts in one complete cuts, no stopping.


And of course our little supervisor had to come over and inspect after the first cut.  I don't know if she approved or not, she has some pretty sad tail.  And don't worry she was no where near us when we were using the saw.  That is too much noise for the little one.


And here is the 45° angle all cut.  Look how pretty that looks.  And it looks like a deck.  And after we were done with this side, we did the same thing on the other side.  And did I get photos, NO.  I forgot to get a photo at the end of the day, well it did start to rain right as we were finishing up.  We couldn't have timed it better.

So this is where we are now.  This is about where we are going to end it this year.  J is pretty busy with school, so the deck is going to be put on hold until next spring.  Then next spring we are going to add the stairs and the privacy wall and the pagoda (I hope).  But for now, this will have to do.

Tomorrow I will go over the process we did to get the "invisible" screws.  It looks really nice and you don't even notice the fasteners.  And I'll have a photo of the WHOLE deck.

What did everyone else do this past weekend?  And DIY projects or did you do some decorating for Halloween?    

Monday, September 23, 2013

Deck Building - Day Four and Five

Oh my, I let a whole week go by without a deck update.  Well, we really didn't get a lot of work done last week.  It rained almost everyday and last Thursday it rained so hard parts of Madison flooded.

channel3000.com
Here is a photo from the local new channel showing flooding near campus.  It was crazy the amount of rain we got.  Especially after weeks and weeks without any.  We were lucky, we didn't get the 60+ mph winds and hail.  You can click on the photo above to go to the news story if you're interested.

The rain also brought on allergy attack after allergy attack.  I was miserable and actually worked from home one day last week.  It wasn't pretty.

So deck work wasn't really one the agenda.  It had to take a back seat for the week, but this past weekend we got a lot done.  I would say we got 98% of the decking on.

J's parents came over again to help us get this project finished up.  It was my MIL's birthday, so we went out for breakfast at around 8:00, then got to work on the deck at around 9:30.  The work only stopped for birthday pie.  I made an Dutch apply pie the day, I love fall.

And this is what the deck looks like right now.


Okay, so that's not the best photo of the deck.  As you can see we still need to add the front boards, that will hopefully be done this week.


We also need to trim the edges, as seen above.  But these are two things that shouldn't take much time.  But since I said that, they will probably the most trouble.

But you can walk on it and the table it back up there, so if we wanted to we could sit and eat out there.  I'm going to try and get a few more pictures of it, but because of the size, it's hard to photograph the whole thing.

And if you noticed in the photo, there are no visible screws.  I'll go over the method we used in my next blog post.  So stay tuned.

Thursday, September 12, 2013

Deck Building - Day Three

Day three was the "You're on your own, kids" day.  It was just me and J working up a storm on the deck.  But it was a very productive day.  There was a lot less measuring, so it seemed like the work moved a lot quicker.

Our main goal was to get all of the support beams up.  These are the beams that run with the decking and sit on the posts.  These are where the joists will sit (Joists run perpendicular to the decking).  These are what give the deck the main support.

And what was the first thing we had to do?  Measure.  We had to measure how long the first one would be and then try to make sense of all the boards we had.  We planned our deck at Menards and ordered our material from the deck plans we made there.  You would think that they would tell you which boards to use where, they didn't.  So it was like putting together a Lego Ferrari without the instructions.

Once we figured out what boards went where, it was time to get working.  Like I said before, the support beams support (go figure) the deck, so they need to be beefy.  You do this by taking two 2x8 and screwing them together.  Then you are left with a big old board to support your deck with.


These boards get attached to your posts.  So after we would put two boards together, we would set it on top of the posts and screw it down.  You use special bracket for this so that bad boy's not going anywhere.


This process didn't take that long.  The longest part was the 45 degree sides.  That took a little bit of planning before hand.  But overall, this wasn't that difficult and we were done with the support beams by lunch.  Which was the first time all weekend that we actually had time to sit down and eat lunch.

After a quick lunch of left over Japanese (nom nom), we headed back out to start installing the joists.  These are pretty easy, but there are a lot of them, so they took time.


The joists would go in the bracket and then we would measure the end to make sure they were straight.  Once they were straight we would attach them to the support posts with a bracket.  I've learned there are a lot of different brackets when you build a deck.

We got about half of the joists installed before we had to call it a night.  So not to bad for a days work.  And look at all we got done in three days.  Amazing.  I mean we're like 70% done already.  That's pretty awesome.  We're hoping that we can finish this baby up by next weekend.  Okay, not finish, but get the decking on by next weekend.  Then comes that task of figuring out how to install stairs, and benches, and a privacy wall, and a pagoda.  But we'll be happy with decking by the weekend.

Tuesday, September 10, 2013

Deck Building - Day Two

Okay, time for day two of deck building.  The day that it sorta, kinda, maybe starts to look like a deck.  Day two started at around 7:00 am again.  Another early day.  I wasn't even dressed yet when J's parents pulled into the driveway.  My back hurt, my wrist hurt, my legs hurt.  But I knew it would be worth it.


So how did day two start?  Well we started on of the most important parts, we put some posts in some holes (people, please, get your mind out of the gutter).  This was the most tedious, time consumer part of the deck.  If I thought we measured a lot the day before, I was mistaken.  Everything had to be measured and remeasured to make sure things were level and even.  

Each post had to be measured to see where we needed to cut them.  We had 10 foot boards, but only needed them to be 4-5 feet long, so we could get a couple posts out of each board.  So J would measure the depth of the hole and then add a few inches on, so that we wouldn't come up short on any of them.

Once the board was in, J's dad would hold it straight and then we would slowly back fill the hole.  You get to use a little corner level thing to do this.  It attaches right to you're 4x4 so that you can make sure it's level in all directions.


We did this for all 13 posts.  This took us a looooong time.  In the hot horrible sun.  It was 90 degrees all weekend.  And we weren't even close to being done.


After the posts were in there was more MEASURING.  We had to make sure that the deck was going to be level, so all of the posts had to be measured and cut.  Here's J's dad measuring some of the first ones.  The beams need to rest on the posts, so we needed to measure to the bottom of where the beams had to be in order to know where to cut.  This meant we had to put in a joist, put a mock beam under it and measure from there for all of the posts.


Once we did that we double checked using a water level.  This is just a clear plastic tube that has water in it.  So we went to every post to double check our measurements from before.  Luckily for most of this, I sat in the shade.  I was a tad bit of a slacker on day two.


After measuring and double checking, it was time to cut.  J used the circular saw to cut all 13 posts level.  Then after they were cut, we went back and measured again to make sure they were the correct height.  See, I said day to was a lot more measuring.

This was about as far as we got on day two.  But we had the post in and cut, so the rest of the deck would be a little bit easier, right?!?  You'll have to check back to see.

Friday, September 6, 2013

Deck Building - Day One

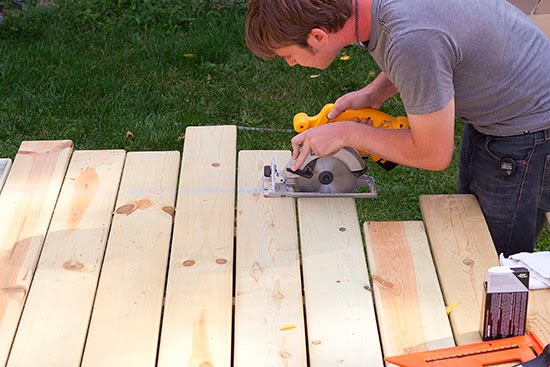
The first day of deck building is pretty uneventful.  Well, it's not that it's uneventful, it's just that the work you do on day one doesn't really look all that exciting.


First you have to measure and measure and measure.  J measured everything out and put up string so that all the posts would be straight.  You don't want a crooked deck.  I ran to the grocery store to pick up some breakfast for everyone.  This was supposed to take 10 minutes, it took 45.  Last weekend was the first Badger game (and a home game), it was Taste of Madison, and it was the tail end of move in for the new students.  Oh, and it was a holiday weekend.  The grocery store was packed.  So by the time I got back home, J had pretty much finished up all the measuring.


Around 12:00 J's parents showed up to help us.  It was nice of them to come help because there were a few things that we couldn't have done ourselves.


After everything was measured out, it was time to mix the concrete. This process is pretty simple, one bag of concrete per hole.  The hole doesn't need to be filled with concrete.  I mean these holes were 18 inches by 4 feet, that would have cost as a fortune.  The concrete just needs to be at the bottom of the hole to spread out the weight of the deck.  Then you back fill the hole with dirt.

So we mixed up the concrete in a little black tub.  This is pretty straight forward.  You just put the dry cement in and add water until it is the right consistency.  You want it to be not too runny and not too dry, just in between.  Like making dough.


After it was mixed up, in the hole it went.  We used a tamper to make sure it was level, but that's about all you have to do.  Throw it in there and wait until it's dry.  Exciting.  This took us a couple hours to mix up all the concrete and pour it in the holes.  It's a lot more time consuming then you expect it to be.


Once the concrete was in, there was pretty much only one other thing we could work on.  We put the brackets on the ledger board.  This is the board that attaches to the house and holds the joists.  It was fun.  It was more measuring and screwing (not that kind of screwing, get you mind out of the gutter).

Once the brackets were attached, the ledger board needed to be attached to the house .  Our deck is a low deck, so we needed to attach it to the concrete footing of the sun room.  I don't have any pictures of this because it's a four person (at least) job.  But I can go over what we did.

We measured out where the anchor needed to go.  They needed to alternate top and bottom between each bracket and be about 2 inches from the edge of the ledger board.  You can kinda see in the photo above.  Once these were measured out, they had to be drilled.  Concrete anchor for this type of project are pretty big, so we needed a hole larger then 1/2 inch.  

The holes were drilled into the board and then it was time to hold that bad boy up to the house and get it in place and level.  This was the four person job.  Once we had it in place the holes had to be drilled.  We needed a pretty heavy duty hammer drill to do this job.  Three of us had to try and hold this board as level as possible and then one had to drill the holes.


Once the holes were drilled in the concrete, the anchors had to be hammered into the concrete.  Then the ledger board could go up on the anchors.  We were right on, the board was still very level, so we just secured the ledger board down with washers and nuts.

Then we installed the flashing on top of that.  The flashing is in place to make sure water doesn't sit on the ledger board and rot it over time.  It's just a thin piece of metal that is in the shape of an L.  You slide it on top of the ledger board and under the siding.  Normally people will screw it in place, but because ours was a pretty tight fit, we just used some silicone calk to "glue" it down in place.

And that was it  for the first day.  There wasn't really much more we could get done and it was already getting dark by this time.  So we called it a night, got some dinner, showered, and passed out.  Just so we could get up the next day and start work again.  ;-)

On a side note, I will be at the Monona Farmer's Market this coming Sunday (Sept 8).  So if you are in the neighborhood, you should stop by and say hello.  I'll be there from 9:00-1:00.

Thursday, September 5, 2013

Approved and ready to go

So after the holes were dug (13 holes that were 4 feet deep by 18 inches wide), we had to call the inspector so he could come out and measure.

This process took about 5 minutes I think.  I'm not sure because I didn't even know he stopped by.  I went downstairs to throw in a load of laundry and when I came back up, there was an approval tag in the yard.  So that's good I guess.

My next step was to call Menards and set up a delivery date.  We had purchased the materials mid August, so that was the easy part.  I just called and asked them to deliver as soon as they could, which was this past Saturday morning.


We got these two stacks of lumber delivered at 6:45 am on Saturday.  I felt bad because I was worried we woke up our neighbors, but they assured me they didn't even notice.  Side note - J wanted me to point out that this picture doesn't represent everything that came, we had already moved some of the stuff before I took this picture.


And then we got started on the deck, but you'll have to stop back to see all the progress we made this past "holiday" weekend.

Wednesday, September 4, 2013

Tuesday, September 3, 2013

August 2013 Goal Accomplishments

So this past month has been a busy here.  We've worked had to get a bunch of things done before this semester started.  This is going to be a very intense semester for J, so we knew we were not going to have time to work on that many projects this fall/winter.

1. Get the Plans for the Deck Approved


Done, Deck plans approved.  We got down to the city about 15 minutes before they closed, but we made it.  And we left with the permit to get going on the deck. 

2. Build Deck

Okay, so this was a little ambitious of us.  Did we really think this would be one goal.  This was split up into many goals.  One was to get the holes dug, check.  Get first approval, check.  Get lumber, check.  Pour concrete, check.  And now we're currently in the process of building the deck.  But we did get about 50% of it built before the end of the month. :-)

3.  Fix Garage Door

This didn't happen, we were too preoccupied by the deck build.


4.  Paint Coffee Table

I didn't get this done either.  I wanted to get it done before J started school, but that didn't happen.  Hopefully I'll be able to get it done this first week of September.

5.  Put up Shelves in Studio


Done!  I got a bunch of shelves up in my studio and now have a place to put most of my things.  But this room is far from finished.

6.  Pick Out a House Color

Done! We decided on a house color.  We were actually going to start painting last week, but it was in the high 90s here with humidity at 100%.  That is not quite ideal painting weather.  But we have the paint picked out, we just need to pick it up and start that project.  Hopefully in the next month or so.

7.  Paint the sun room door

We have been looking at a primed sun room door since we moved in.  It wasn't that big of deal before, but now that we sit out there all the time, it was annoying.  So I sat down and painted that bad boy bright white.  It looks so much prettier.

8.  Get rid of old couch/move bar/find new couch

This one was a few different goals.  We sold our old couch to some friends.  It was a really nice couch, but we just didn't have a place to put it.  We then moved the bar to much nicer area.  It's the perfect little nook.  And finally we found a small couch that would fit in the basement.  We haven't bought it, but we did find one.  Maybe that will be a goal for next month ;-)


So we didn't get everything done, but we did get some extra stuff finished.  So I guess that's good.  The deck is progressing along and we should have it finished by next weekend (fingers crossed).  For the rest of the year we are going to be focusing on cleaning up the clutter in the house. You know, getting rid of all that stuff that got hidden away when we moved in.  That is something that we can accomplish while J's studying away.  I also think I'll be working on my photoshop classes more, I've been pretty bad about finishing those.

So what was everyone else up to this past month?  Did you accomplish all your goals you set or did you make new ones?