Tuesday, August 28, 2012

We're almost there

Like I promised yesterday, I have new bathroom pictures for everyone.  We worked our butt off, but now it's about 90% finished, and boy is it lookin' pretty.  Our real estate agent was speechless this past weekend when I showed if off.  He was actually speechless. He was absolutely floored by the work we've done on the house, all of if by ourselves (with the help of family and friends).  It made us feel so proud.

But lets get to some pictures.  If you don't remember what our bathroom looked like when we started here's a reminder.


It looked like it belonged up in cabin in the north woods.  Not exactly our style.  So with a couple of months of work and a lot of hard work we have this.....


Not bad, right?  So everything is finished except for the tub.  That needs a little bit of work still, but overall, we're finished.  We had so many lovely comments from our family and friends.  My one coworker said that she would be happy living in our bathroom.  Now I don't know if it's that nice, but I'm enjoying it.

So lets break this thing down a bit.

The old vanity, sink, shelf unit, mirror, and lights went to the ReStore so hopefully someone else could use them and make them their own.   Less waste for the landfill, which makes us happy. 


Unfortunately the toilet was not salvageable.  That had to go to the curb, but maybe someone picked it up to make something else with it, you never know.  And that lovely wood seat was literally falling apart, so I was pretty happy when that went.  


The old floor was ripped up and and the new floor was placed right over the original floor.   We used a glueless vinyl flooring that was pretty easy to install (after a template of our bathroom was made).

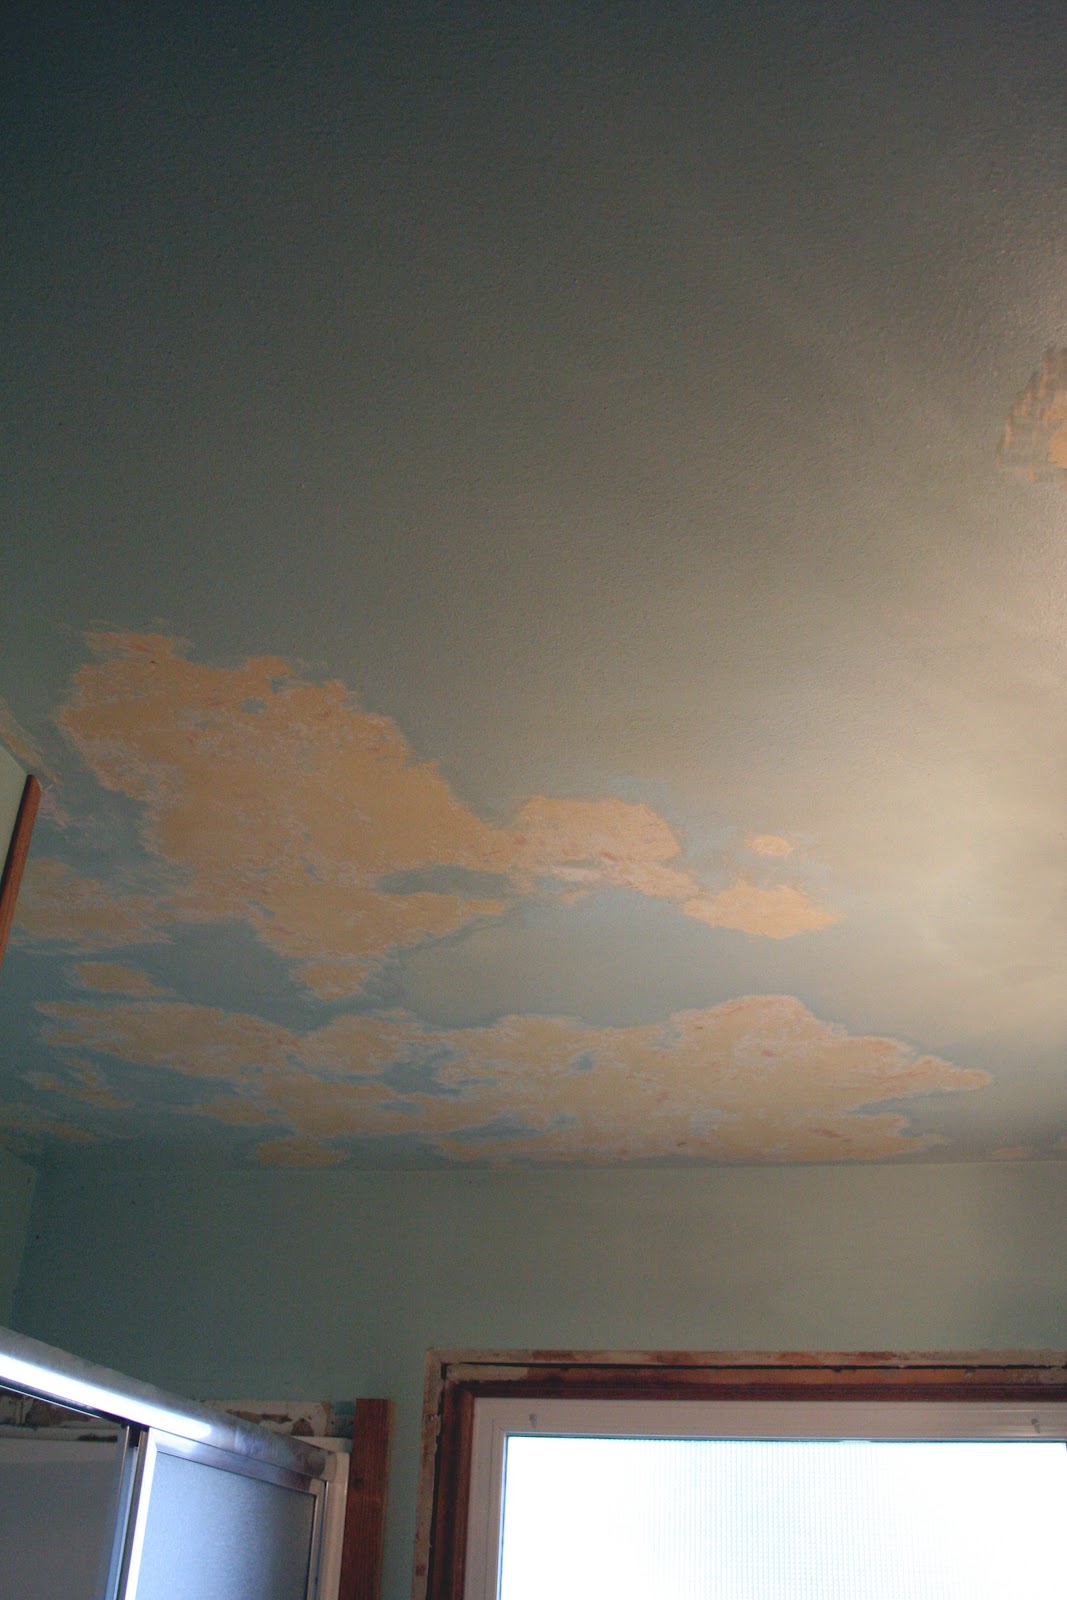
The paneling got a good dose of bright white paint and the walls got a lovely grey color.  This instantly modernized the room.  God I love grey paint.


The new vanity lights were a little DIY project.  Since we were going for a kinda of industrial/farm look, we picked up some vapor tight lights from Menards.  These are the ones you see in factories and barns.  We then picked up a mirrored vanity light from the ReStore.  And after combing the two.  This is what we have.  We got a ton of comments on these as well.  And the best part about it; the bathroom is super bright now.  Perfect for getting ready in the morning.  


Then the vanity was made from scratch.  We didn't buy plans, just sketched something up and gave it the ol' collage try.  If people are interested, I can make up some plans for how we constructed it.


The huge mirror was also a ReStore purchase.  We didn't just want a builders grade mirror in there after all the work we did, so we added some trim to "sexy it up" as J says.   The second we added it, the bathroom looked two times the size.  It was amazing.

The faucets were our splurge, and I'm in love with them.  Everyone thought they were the coolest thing ever.

Then the extras, towel bar and hooks, came from Goodwill and the Restore respectively.  The art was another DIY project so that the walls wouldn't look so bare.  I'm still up in the air about how it turned out, but it will work for now.


So that's a quick overview of everything we updated in the bathroom.  Not bad, not bad at all.  I'm so glad we updated the bath.  Now I'm hoping we can have a lot more parties, because I love to entertain.  And I think we have a house that is worthy of entertaining.


Have you done any major renovations lately?  Isn't it just the most fulfilling feeling ever when it's done?    

Monday, August 27, 2012

The craziness is behind us


Craziness?  Yeah, after this weekend, I would say craziness.  This past weekend was our housewarming party.  Now I know we've owned our house for a year and a half, but we weren't quite ready to have a ton of people over until now.  Okay, I'll admit it, we weren't quite ready this past weekend, but it's okay.  And guess what, we partied for 16 hours, and I have absolutely no pictures to speak of.  I was so behind Saturday morning, that by the time people started showing up, I was still setting up.  So by the time I had regained my balance, the food was decimated, some people had already left, and it was getting dark.  Too bad, I had planned on taking hundreds of pictures.  I always take hundreds of pictures.  What was I thinking?

But even without the pictures, I can say it was quite a fun time.  I'm not sure if our neighbors are super excited about us anymore, but hopefully they can forgive us.  We don't party until 3:30 in the morning that often.  And the saving grace was our neighbors closest to us were on vacation, so they were not here to hate us.

Little pug had a great time and was so well behaved.  She was more then happy to do tricks for anyone that had some carrots.  She even got a few housewarming gifts herself; a tug toy, a little alligator, and a knee cap (gross).  And she learned the hard way that there is a limit to the number of carrots she can consume in one day, she was the only one that threw up.  Don't worry, she's feeling better now.

I want to thank everyone that came out and celebrated with us.  It was so much fun.  Now we have a nice little collection of wine and thanks to my mom, a set of nice patio chairs.  It was a lot of fun and I hope we can do it again soon.  But not too soon, pug pug needs to rest up.  :-)

 I will have some updated bathroom pictures tomorrow.  It looks so much different then only a few months ago.  I can't wait to share it with you.

I hope all of you had a fantastic weekend. 

Thursday, August 16, 2012

Garden Update!

We're still plugging away at the bathroom redo.  We only have eight more days before our party, so we're down to crunch time.  But I think we'll be fine.  Things seems to be wrapping up nicely.

In other news, my garden has really started to get crazy.  I don't know if it's just happy the 100 degree weather has passed or that wet stuff that falls from the sky has come back, I think they call it rain.


My tomato plants are so big they have grown up over the cages and the fence and then all the way back to the ground.  That means they are roughly four to five feet tall.  And they are covered in tomatoes.  I've already had a few of the super sweet cherry tomatoes, and boy are they good. 

I also have two chili plants that won't stop producing peppers, so I've made some infused oil with that.  Yum!  The green pepper plants are finally budding and will hopefully have some nice large green peppers soon.

And that crazy stevia plant is about three feet tall now.  If you haven't tasted a leaf off a stevia plant, let me suggest it too you.  It's so strange.  It's a huge shock to taste the extreme sweetness.

I just can't believe these plants, and the best part, I started them all from seeds.  I know, right.  This was the first year I attempted to start from seed, and look at how crazy they are.  I guess that gives me a little more confidence for next year.  


My herbs are also going crazy.  I have cut back the basil at least five times this year, which means I have a freezer full of pesto and basil leaves.  And they just keep growing, but I'm not complaining. 

The mint is behaving just like mint behaves, taking over everything.  I've cut back that plant so many times, but you would never know it.  I've even propagated two new plants from the cuttings.  It was very easy.  I just cut some of the mint, stuck it in water until roots appeared (about a week) and then planted them.  So now I have three crazy mint plants.  But that's okay, they smell fantastic and they look really nice, so I'll let them be as crazy as they want to be.

So that's a little update on the plants.  I'm still sad I lost most of my cold weather plants, but I've started some late lettuce and some snow peas, so with any luck I'll at least have one harvest of both.

How are all of you gardens doing?  Hopefully they made it through the tough weather.  I've learned a lot this year and can't wait to apply that to next years planting and harvest.  I'm hoping to get better at this whole gardening thing with practice.

Take care and stay creative.  

Wednesday, August 15, 2012

Hump Day!

Wow, it has been quite the week so far.  I haven't felt like writing much because of this lovely migraine that just doesn't seem to want to stop.  I guess I was kinda getting use the fact that my migraines seemed to be giving me a break.  I mean I haven't had one for a few weeks, which is a record with me.  But alas, on Monday night, they came creeping back into my life.  I'm sure it's due to the fact that I have been crazy busy at work and home.  We have a new resident AND a fourth year student doing rotations in our lab.  Which is cool, but having them both start on the same day seemed to be a tad stressful for me.  I was seriously running around like a chicken with it's head cut off.

We also had a little setback with the bathroom remodel this past weekend.  J's dad got sick, so he was unable to come help us with the electrical work, i.e installing the new lights, fan, and outlets.  So the bathroom is still sans lights.  But that's okay, J's dad is feeling much better, so the plan is for him to come help us this coming weekend.  Talk about cutting it close, our party is in less then two weeks.  But we can do it.

The good news is we got the vanity done.  And boy does it look nice.  Well, I guess I'll let you decide that.   


It's still in the garage, but the poly needed to dry, so we couldn't move it into the bathroom.  But tonight we should be able to move it into place and see how it looks.  I think it looks amazing.  I mean if you think that only a few days ago we had this...


We also got the trim cut for the mirror.  There was a little problem with the 45 degree angles, but we think we can fix them.  We're not sure what happened, we've never had a problem before, but I guess the every project has to have some sort of hiccup.

 
So that's where we are right now.  Getting ready to install everything and then moving on to getting all the plumbing hooked up.  Who knows, we might have a working bathroom by this weekend.  I can only hope.

I hope everyone is having a great day and as always, stay creative.  

Friday, August 10, 2012

Pesto Potatoes - Food Friday


Happy Friday everyone!  I hope everyone had an acceptable week and that you have a fantastic weekend planned.  I have an art show tomorrow and then we plan on finishing up work on the vanity.  Fun, Fun!

But lets get to the important thing, today's recipe.  Today I have one of our favorite recipes.  It's delicious and extremely easy to make.  Pesto Potatoes.

The other day I was asked, "what do you do with pesto?"  I was taken back a bit, because I thought everyone knew that pesto is a magical mix that can be put on anything.  It's pure deliciousness.  If you've only had pesto on pasta (or if have never had it), you have no idea what you're missing out on.

So lets get started.  Gather up your supplies; pesto and potatoes.  Done!  Like I said, this one is an easy one.


Cut up the potatoes in cubes.  I added green onion and carrots to this batch because I also made potato soup that night, but you can add what ever veggies you want.  I also added both red potatoes and standard russet potatoes.  You can use what ever kind of potatoes your little heart desires. 


Add the glorious pesto and mix.  You can add it to your pot or you can put everything in a ziploc bag and shake it.  Just make sure you cover all the potatoes.  Then bake.


Now it's time to enjoy.  These babies are so good.  We rarely have leftovers when I make these.  You can even sprinkle them with a little cheese if you want, but we like to enjoy the pesto flavor.  Trust me, you're gonna love these.

Pesto Potatoes

Ingredients
~ 4-5 potatoes, cubed - make as many or as few as you need
~ 1-2 chopped green onion
~ 2-3 chopped carrots - optional
~ 2-3 tbs pesto

Directions
1. Preheat oven to 350F
2. Chop/cube all your veggies
3. Place veggies in large oven safe container
4. Add pesto to the veggies.  Start with a small amount and add more as needed to coat all the veggies.  
5.  Cover pan (lid or foil) and place in the oven for about 30-60 minutes.  Check the veggies after 30 minutes to see if they are soft, cook until they are soft.
6. Take off the lid/foil.  Turn on the broiler and cook until the top is brown.  I like to stir the potatoes and then place them back in the broiler to make sure they all get browned.  This takes about 15 minutes
7.  Serve and enjoy.


See pretty easy and it can be made with any veggies you have on hand.  You could even make this without the potatoes.  Just chopped up some veggies, add pesto, and bake.  Yum.

I hope everyone has an enjoyable weekend, and always stay creative friends.

Wednesday, August 8, 2012

This and That

Oh my, it's Wednesday already.  Where did the week go?  The days seem to slip by so quickly, I'm going to have to grasp at the last days of summer.

J started his internship this week.  That is the sign that school is ready to start again.  I believe he starts class in three weeks.  Oh my.  But his internship is going well, it's only a week long, so nothing too taxing.  We've been biking in together, which I have enjoyed.  I normally bike all by my little self, so having someone with me is nice.  I also have been waiting for him at the Terrace every afternoon.  I know, it's difficult sitting by the lake and enjoying a beer, but I'll endure.

We got a good start on the vanity over the past weekend and I'm trying to finish up all the staining.  Then we can get it built and the sinks installed this coming weekend.  Oh it will be so nice having a working bathroom on the main floor of the house. 


We built the frame first and then brought it into the bathroom and set the sink on it.  We then decided where all the shelves would or could go as well as how the plumbing would be run.

This seemed like a tedious task at first.  I didn't really want to lug this into the house, move the sink, measure, move the sink back to the box, and then lug the frame back outside.  But, I will admit, it was a great idea.  It made it really easy to decide where our shelves would go and it made us realize that it was much to high.  Like ridiculously high.  Like my 5'5" mother would have had to use a stool to use it.     

So after all of this, we brought it back outside and cut off about 2-3 inches.  It's still high, because that's what we want, but not so high you need stairs to reach it.  I then started the awesome (sarcasm) job of staining all of the boards.  


We decided to go with an ebony stain to offset all the white going on in the bathroom.  It's the same stain I used on the living room table, so we already knew we would love it.  I followed your standard procedure for staining; sand all your boards, wipe them clean, wipe on the stain with a rag, let it sit for 5-15 minutes, wipe stain off.

I'm just using your average oil based stain, the kind that can be found at any home improvement store.  Don't forget the gloves when staining, it saves so much on cleanup time.  Trust me, I've forgotten before and then had stained hands for days.  And I know that veggie oil will help in cleaning it up, but it never gets all of it.   


Look at all those slats.  We're doing slatted shelves which will be nice and open, but boy is it a lot of work.  I think there are 36 of them.  I'm glad we're only doing two shelves, I think I would go crazy if we did any more.

Right now I only have one coat of stain on them.  They look nice, but I think I'm going to go with another coat.  I'm hoping that two coats will be plenty.  We'll see tonight, since tonight is coat two night.  And as soon as all these babies are stained (as well as the frame), we'll be able to put it all together and seal it.  Oh I can't wait to see what it looks like.


We also installed our new garbage disposal. Okay, let's be honest, J installed the garbage disposal while I just sat there. Then I got bored and left to paint trim.  He said it went pretty smoothly.  It only took him about an hour to do.  Not that bad.


The old one was really easy to remove and the new one went in just as easy.  I think that part took about 15 minutes. 

 
The longest part was hooking the electric back up, but even that only took a short while.  I think it took J longer to find the electrical tape and shrink wrap then it did to actually hook it up.

So now we have a new garbage disposal that works and doesn't drench the cabinet.  It's nice.  We did make sure to go with a disposal that was all stainless steel on the inside because the old one, which wasn't really all that old, was completely rusted.  So lets hope this disposal lasts us years and we don't have to think about it again.

So those have been some of the things we've been working on the past couple days.  We're just trying to finish up getting all the smaller things, as well as the bathroom, done before our party.  Our list of things to do is long, but we're chipping away at it.  Wish us luck.

Friday, August 3, 2012

August Goals


I cannot believe it's August already.  Where did the summer go?  I guess when you're busy, busy, busy, you don't even notice the time slipping by.  But fall will be here soon and the kids will be in school; that means students on campus again.

So what do we have planned for August?  Well if I didn't mention it about a hundred times already, we have our housewarming party.  Which means as much of the little stuff as possible needs to be finished up in the next 3 weeks.  Oh my, this is gonna be interesting

1.) Make the vanity and install the sink
      ~ Since our sink finally came in last week, we need to make the vanity, get it stained, and get it installed.  You know, little stuff.  ;-)

2.) Finish up the new coffee table
       ~ This is a actual simple one.  I just have to apply three coats of polyacrylic and I'll be done.  Okay, I have to sand between coats, but still, not too hard.  And if we don't get around to painting the legs, it's okay, because I stained them.

3.) Caulk the tile in the kitchen
       ~ This should have been done months ago.  You know, back when we finished installing the tile.  Unfortunately, it was not.  We have to get this done.  No excuses. 

4.) Fix the upstairs shower
       ~ This is an extremely important item.  We have to figure out a way to fix the tub problem and then install the surround stuff.  Haven't completely figured out how we're gonna do this, but we'll think of something, hopefully.

5.) Install all the trim in the bathroom
       ~ Well, honestly, we have to install the trim in almost all of the house.  But the bathroom is the most important.  That's what holds the non-glue vinyl in place, so it's more than just decorative.

6.) Pain the Sunroom
       ~ This one is an optional one.  I would love to get the sunroom cleaned up and painted, but if need be, we can put this one off for a while.

7.) Install the new garbage disposal
       ~  This was an unexpected one.  But sometimes things like this happen and your old garbage disposal wants to break and you need a new one.  Hopefully it will be as easy as the box says.

8.) Plan and throw a housewarming party
       ~ This one will, hopefully, be fairly fun.  I love planning parties and I love having them, so I think we'll be okay.  I'm just hoping (okay, we're both hoping) that I don't start freaking out because we haven't accomplished everything.  This happens sometimes, thank you OCD. :(


That's a lot.  But, I'm going to stay positive and believe we can at least take a large chunk out of that list.  I mean look at what we accomplished last month.  As of right now, I'm doing good, let's see what I look like in a week or two.

What are you're plans for August?  Do you have a vacation planned?  Or our you getting ready for school?

Here's a picture of Toonces in a bag.  Hope it brightened your day a bit!


Have a good weekend and as always stay creative my friends.

Thursday, August 2, 2012

July Recap

This past month was one of the most productive month's we've had in a long time.  We worked our butts off and boy does it show.  Well, it shows in the house, my butts still right where it started.  We accomplished every single goal we set for our selves, plus a few more.  I'm very proud of us.  Now we need to push ourselves before our official Housewarming party on Aug 25th.

So what did we accomplish?

Clean Up The Downstairs Bathroom

   
This was an easy one.  Our downstairs bathroom was never used.  Okay, it was used, but only during band practice.  It was the typical "man's" bathroom.  You know, the "we don't really care how gross it is" kind of a bathroom.   I thought I might throw up when I looked in the toilet, it was that bad.  Good god, doesn't J ever clean?  And the shower, we had NEVER used the shower down there.  It actually turned into a type of storage area.  Yeah, we used the shower to store things.  Doesn't everyone do that?

But with some good old elbow grease, it's looking like a functional bathroom.  We have a lot of plans for this bathroom, but they are pretty far down on the to do list.  Some day this bathroom with be our spa escape from the world, where we go to relax and unwind.  Someday.


Scrape the ceiling in the bathroom


We not only scraped the ceiling, we primed and painted it.  It looks fantastic.  No more chunks of paint hanging from the ceiling.  No more awful sea foam green with little spots of yellow.


We don't plan on leaving the ceiling white in here, but for now it's working.  Our plan is to eventually install faux tin tiles in here.  But with what these tiles cost, we'll be holding off on that project for a while.  Sometimes I like to imagine what the room will look like with the tiles, and then a smile will grace my face because it will be dreamy.
 

Pick out a new toilet


This is another one of our projects that we accomplished and then when beyond.  We didn't just pick out a toilet; we picked one out, bought one, and installed it.  Oh yeah. 

And now I know everything there is to know about toilets and toilet shopping.  My life is complete. :)


Take down wood trim around tub      

This took me about 2 minutes to do.  I just got up there with a crow bar and pulled them off.  Now what we found under the trim made us pretty sad.  The install job on the tub and surround was pretty bad.  And it was installed right before we bought the house.  Now we have to figure out how to fix it and fast.

So this is one got crossed off our list, but it actually ended up giving us more work to do.  But we'll figure out something soon.  I'm sick of taking a shower in the tiny downstairs one.


Find a large mirror

This was a happy occurrence a week or so again.  J had gone to the Restore with his dad to drop off our old vanity and medicine cabinet and then see what they had.  You never know what kind of treasure might be waiting for you.  There it was, the prefect size mirror for the bathroom.


Now this is one of those, good enough for now items.  We don't necessarily want just a large mirror, but for now it's the easiest fix.  And it won't just be a builder's grade mirror up on the wall.  I've primed and painted some nice trim for around it so we can, as J put it, "sexy it up."


Prime and paint the walls


After a very exhausting round of priming and painting, the old paneling in the bathroom is now bright white and the top half is a misty grey.  We're pretty happy with how it looks.  Okay, we're ecstatic about how it looks.  Both of us will stop and stand there, just admiring our new bathroom.  It's a good feeling. 


Replace the floor in the bathroom


This one was one of the simplest one we did.  We went with a glueless vinyl that just sits on the floor.  All you do is cut it and put it down.  You're done.  Easy Peasy.

And after we found the original floor in fairly good condition, we didn't have to install a subfloor.   Which made us happy and relieved since the original floor was asbestos tile, and we didn't want to mess with that stuff


Find a faucet


We decided to splurge on our faucets since we're DIYing everything else.  We looked at every store in town that carried faucets and then a little online and we made the decided on the Pfister Ashfield Single Faucet.  It's so pretty.  I'm so glad we decided to get something a little more interesting.  Swoon.


 Find some art for the downstairs bathroom
   
This was a personal goal for me.  I was sick of the plain walls and fluorescent lights in the downstairs bathroom, see above.  Now I can't get rid of the lights right now, and I don't have time to repaint, so I decided a huge print would be the next best option.

J requested that we get the The Great Wave off Kanagawa, the well known Japanese woodblock print.  I was happy to oblige, since I make most of the art work decisions in the house.  I have to say it looks pretty nice up there.  Way to go boy!
 

Pick some veggies from the garden


I wasn't sure if I would be able to accomplish this one, since I don't really control this one.  But I did.  I've gotten three heads of garlic, two chilies, and two tomatoes.  Not a lot yet, but there will be more.  A lot more. 


Wow, that was a lot of crap.  But then it gets more impressive.  I also made new pillows for the living room, made a few more sets of fabric napkins, sanded and stained the coffee table, purchased and sanded the lumber for the vanity, and bought a slightly used futon for the "library".

How did we accomplish all of this?  No seriously, if anyone knows, I'd love to know.  I guess it's true what they say, you can do anything you put your mind to.  But now I'm ready for a vacation.  Unfortunately, there is a ton of things that still need to be finished.  That vacation will just have to wait until fall.  And as long as you can keep it secret, we're planning one hell of a vacation for this fall/winter.  Don't tell anyone, we haven't.


And on a sadder note, we also lost our little ferret, Fatty, in July.  We knew that it was coming, but it never makes it easier.  She passed quietly in her sleep one night.  She was quite the rascal and had a huge personality.  She will be missed.     

Take care and always stay creative.

Wednesday, August 1, 2012

DIY - Coffee Table Overhaul


A few weeks ago, or maybe it was just last week, all the days seems to be blending together for me, I showed you a picture of our new coffee table.  Don't remember, here she is.


She was in really good shape when we bought her, just not the right color.  So we decided to sand her down and restain her.  I've done plenty of staining in the past, remember the kitchen cabinets, so off I went to make her a beauty.

I gathered my supplies.  I used a hand sander, I would have loved to use a belt sander, but we don't have one.  I used heavy grit sandpaper to remove most of the polly and stain and a medium grit to finish her up.  Then some ebony stain and of course and some polyacrylic, in a satin.

And away I went.


I started sanding the table, carefully. It's not a solid wood table, the top is inlay, so I didn't want to sand through the inlay.  I broke through in a few places, but nowhere you'll notice.

And after J tagging in to finish up sanding the legs.  We had a nice looking table all ready for stain.


It is a nice looking table.  I wiped it down with a damp cloth to get all the saw dust off of it and let it dry while we took our daily trip to the hardware store.

After lunch, I headed back out to stain our new pretty table.  I tested the stain on the legs, and it looked good, so on to the rest of the table.  I used an clean rag to rub the stain with the grain.  I let it sit for about 10 minutes, then gently wiped it off with a second clean cloth. 


I got the whole table stained, and it looked good, except for three small places where it was not as dark.  Now this is where I should have just stepped back and let it dry.  Then I could have put a second coat on and seen what it looked like.

But did I do this, no I tried to gently sand the problem areas, only to get three areas that refused to take the stain.

Frustrated, I gave up for the night.  I knew that the whole top of the table needed to be resanded and restained.  Not what I wanted to deal with.  Sometimes it's just better to walk away from a project then try and deal with it while you're upset.

So cue the next day.  I sucked up my pride and sanded the top of the table one last time.  It was a mess getting all that ebony stain off, but I had to do it.  I sanded with a 60 grit sandpaper to get the all the stain off, then used 100 grit sandpaper to smooth everything out.


Doesn't look all that bad.  And it was very consistent, the light and dark areas are from the tree above the driveway.  We actually thought the table looked really cool just like this, but we still wanted to stain it.

I then repeated the process of staining; applied the stain with a clean cotton cloth, allowed it sit about 10 minutes, then gently wiped it off with a second clean cotton cloth.  I made sure there were no streaks and stood back to admire my work.


Success!  Look at that pretty table.  We're so happy with it.  We're so glad we decided to take the extra time to stain the table instead of painting it.  The inlay looks so cool stained and would have been a loss if we would have painted it.  See, that just shows that I don't paint everything.  Just ugly, old, non-interesting wood that isn't worth the work.

I'll apply at least two coats of polyacrylic, my favorite, in a satin finish.  And then we plan on painting the legs, possibly an off white or maybe a fun color or maybe a fun finish like crackle.  So many possibilities.

What have you been working on lately?  Have you refinished any furniture recently?  How did it go?

Always stay creative my friends.